

Direct Answer: What Are the Correct KDP 6x9 Interior Margins?
For a standard 6x9” paperback on Amazon KDP without bleed, the minimum margins are: Outside Margin = 0.25” (0.50” recommended for readability), Top & Bottom Margins = 0.25” (0.65”–0.75” recommended to accommodate running headers and page folios), and Inside Gutter Margin = 0.375” (24–150 pages), 0.500” (151–300 pages), 0.625” (301–500 pages), or 0.750” (501+ pages). If images touch the trim edge, add 0.125” bleed to top, bottom, and outside edges.
1. The 6x9” Trade Standard: Why 75% of Non-Fiction Authors Choose 152.4 x 228.6 mm
Answer Capsule: For KDP 6x9 trim size margins, set inside gutter margins at 0.375" for books under 150 pages, 0.500" for 151–300 pages, 0.625" for 301–500 pages, and 0.750" for 501+ pages. Outside margins stay 0.25" minimum. Trim size is exactly 6.000" x 9.000" (152.4 x 228.6 mm).
That answer is the mechanical part. The strategic part is why this trim size dominates commercial non-fiction, business handbooks, memoirs, and self-help paperbacks. Walk into any Barnes & Noble, any Hudson News at an airport, any independent bookstore in Portland or Brooklyn. Pull ten non-fiction paperbacks off the shelf. Seven or eight of them will measure 6 x 9 inches. That is not an accident. It is the result of four converging pressures: reading comfort, word density, print economics, and shelf psychology.
The Typographic Economy: Why 6x9 Wins at the Line Level
Robert Bringhurst, in The Elements of Typographic Style, sets the comfortable measure for a single-column book at 45 to 75 characters per line, with the sweet spot landing between 60 and 70. This range exists because the human eye reads in saccades—jumps of roughly 7 to 9 characters—and returns to the next line via a precise motor movement. Too many characters per line, and the return sweep loses its anchor. Too few, and the eye thrashes, breaking reading rhythm and forcing the brain to stitch fragments together.
A 6x9 inch page with a 0.500" gutter, 0.25" outside margin, and 0.25" top/bottom margins yields a live text block of approximately 5.25" wide by 8.5" tall. Set in a workhorse text face like Garamond, Caslon, Minion, or a modern alternative such as Source Serif at 10.5pt with 14pt leading, that block produces roughly 65 characters per line. Right in the Bringhurst pocket. No hyphenation gymnastics required, no rivers of white space opening up in justified text, no need for aggressive tracking adjustments.
Compare that to 5.5 x 8.5 inches. With the same 0.500" gutter and 0.25" margins, the live text block shrinks to about 4.75" wide. At 10.5pt, that is roughly 55 characters per line—still readable, but noticeably tighter. Authors who write long compound sentences in business or self-help genres will feel the pinch. Lines break awkwardly. Paragraphs look choppy. The page reads like a mass-market paperback, not a serious handbook.
Compare that to 7 x 10 inches, common for workbooks and technical manuals. The live text block balloons to about 6.25" wide, pushing 80+ characters per line at 10.5pt. Now the eye struggles. Readers lose their place on the return sweep. The fix is to bump the type size to 11.5pt or 12pt, which then inflates page count and print cost. The 6x9 format sidesteps this entire negotiation.
Word Density and Page Count Math
At 10.5/14pt with standard leading, a 6x9 page holds approximately 250 to 280 words of body copy, assuming 32 to 34 lines per page and 8 to 9 words per line. Run the numbers for a 60,000-word manuscript:
// Page count projection
60,000 words ÷ 265 words/page = 226 body pages
+ Front matter (title, copyright, TOC, preface): ~10 pages
+ Chapter openers and part dividers: ~15 pages
+ Back matter (about author, resources, index): ~8 pages
Total estimated page count: ~259 pages
→ Gutter margin bracket: 0.500" (151–300 pages)
That 259-page count lands the book in the 0.500" gutter bracket, which is the most common gutter for non-fiction. A 5.5 x 8.5 version of the same manuscript, running at roughly 220 words per page, would produce about 273 body pages plus front and back matter—roughly 312 pages. That crosses the 301-page threshold, pushing the gutter to 0.625" and adding 50+ pages of paper and print cost with zero additional content value.
Print Economics: The KDP Royalty Math
Amazon KDP calculates print royalty on a 6x9 paperback using this formula:
// KDP 6x9 paperback royalty formula
Royalty = (List Price × 0.60) − ($0.85 + $0.012 × pageCount)
// Example: 259 pages, $16.99 list price
Royalty = ($16.99 × 0.60) − ($0.85 + $0.012 × 259)
Royalty = $10.19 − ($0.85 + $3.11)
Royalty = $10.19 − $3.96
Royalty per sale = $6.23
Now run the same content at 5.5 x 8.5 inches, producing 312 pages at the same $16.99 list price:
Royalty = ($16.99 × 0.60) − ($0.85 + $0.012 × 312)
Royalty = $10.19 − ($0.85 + $3.74)
Royalty = $10.19 − $4.59
Royalty per sale = $5.60
Difference: $0.63 per unit lost to unnecessary page inflation
Over 5,000 lifetime sales, that 63-cent gap costs the author $3,150. Same words. Same list price. Same reader experience, arguably worse. The 6x9 trim simply packages the content more efficiently.
The spine width calculation matters too. KDP uses 0.002252" per page for white paper and 0.0025" per page for cream paper. A 259-page book on cream stock produces a spine of 0.648 inches. That is substantial enough to carry readable spine text—title, subtitle, author name—without cramping. A 180-page book at 5.5 x 8.5 inches on cream stock yields a 0.45-inch spine, which is too narrow for anything beyond a title in condensed type. Bookstore shelving displays spines, not covers. A wider spine gets noticed.
Shelf Presence and Reader Psychology
The psychological difference between a 5.5 x 8.5 and a 6x9 paperback is not subtle. The smaller format reads as a pocket guide, a quick-reference pamphlet, a giveaway. It suggests lightweight content. The 6x9 format reads as an executive manual, a leadership handbook, a serious work of non-fiction. Same manuscript, different perceived authority. Readers browsing a business section at an airport bookstore will pick up the 6x9 book first, because it occupies more visual real estate and signals substance before a single page is turned.
This is why traditional publishers settled on 6x9 decades ago for the trade non-fiction category. It is the format of Atomic Habits, Thinking, Fast and Slow, Educated, and thousands of lesser-known titles that fill the same shelves. Self-publishing authors who adopt it inherit that visual grammar immediately. Readers do not consciously analyze trim size, but they register it. A 6x9 book looks like a book they already trust.
Trim Size Comparison Table
| Trim Size | Average Words Per Page | Ideal Non-Fiction Niche | Shelf Presence Rating |
|---|---|---|---|
| 5.0 x 8.0" | 180–200 | Pocket devotionals, quick-read guides, poetry | Low — reads as pamphlet |
| 5.5 x 8.5" | 210–230 | Novellas, niche workbooks, budget reprints | Moderate — compact but thin |
| 6.0 x 9.0" | 250–280 | Business, self-help, memoir, non-fiction | High — industry standard |
| 7.0 x 10.0" | 320–360 | Technical manuals, workbooks, textbooks | High but niche — signals reference |
| 8.5 x 11.0" | 400–450 | Academic texts, training guides, reports | Very high but wrong category for trade |
Production tip: If your manuscript lands between 140 and 160 pages, consider adjusting leading from 14pt to 14.5pt or adding a brief foreword to push past 151 pages. That moves you from the 0.375" gutter bracket to the 0.500" gutter bracket, which gives the text block more breathing room and prevents the inner margin from feeling cramped in a perfect-bound spine. The reverse applies too: if you are at 305 pages, tightening leading by 0.25pt can pull you back under 301 and save on gutter width.
Warning: Never set your gutter margin below the KDP bracket minimum. A 200-page book with a 0.375" gutter will have text disappearing into the spine on the inner pages. KDP's automated print review may reject the file, or worse, approve it and ship books with unreadable inner margins. Always match gutter to final page count, not to the page count you hoped for before typesetting.
The 6x9 trim size is not a default because it is easy. It is a default because it solves four problems simultaneously: it produces optimal line lengths without typographic contortion, it packs words efficiently to control page count and print cost, it generates a spine wide enough to command shelf attention, and it signals authority to readers before they read a single sentence. That is why 75% of non-fiction authors choose it. The math holds. The psychology holds. The bookshelf holds.
Generate bookstore-compliant 6x9" print interiors with automated gutters in 5 minutes
Eliminate KDP "text outside margin" rejections forever. BooklierAi automatically calculates gutter step-functions, embeds vector typography, and compiles certified PDF/X-1a interiors.
2. Mirror Margins & Verso-Recto Geometry: The Asymmetry of Bound Paperbacks
Open any professionally typeset paperback to the center. Flatten it against a table. Now measure the white space on both sides of the text block. They are not equal. They were never meant to be equal. A trade paperback is not a stack of identical pages stapled together. It is a folded architecture. Every leaf has a spine side and a fore-edge side, and those two edges behave nothing alike once the book is bound. If you set your margins symmetrically — 0.75" left, 0.75" right on every page — you have just built a book that fights the reader on every spread.
This section covers the geometry that separates amateur files from bookstore-grade files: the mirror margin. We will define verso and recto, prove why symmetry fails, and hand you exact margin numbers tied to page count.
Verso and Recto: The Two Halves of Every Spread
A bound book is read in spreads, not single pages. A spread is two facing pages: the left one and the right one.
- Verso — the left-hand page. In a standard book, versos are the even-numbered pages (2, 4, 6, 8…).
- Recto — the right-hand page. Rectos are the odd-numbered pages (1, 3, 5, 7…).
Here is the part that trips up first-time authors. The inside edge — the edge nearest the spine — sits on the right side of a verso and on the left side of a recto. The outside edge — the edge nearest the fore-edge, where the reader's thumb flips the page — sits on the left side of a verso and on the right side of a recto. The two pages are mirror images of each other. Your margin settings must mirror too.
Quick mental model: Imagine the spine as a vertical hinge running down the middle of the spread. The gutter margin always faces that hinge. The outside margin always faces away from it. On a verso, "away from the hinge" means left. On a recto, "away from the hinge" means right.
Why Symmetric Margins Fail: The Gutter Trap
Say you set up a 6" × 9" interior with 0.75" margins on all four sides. Clean. Symmetrical. Wrong.
On the verso page, that 0.75" right margin becomes your inside gutter. On the recto page, that same 0.75" left margin becomes your inside gutter. But the physical gutter is not a flat 0.75" of white space — it is a curved trough. The paper bends into the spine. The closer the text sits to the fold, the more it curves away from the reader's eye. At 0.75" from the fold, the innermost characters on the line can lose 15–25% of their apparent width to the curve. Rendered in 11pt Garamond, that means the first character of every line on a verso page looks like it is slipping behind a curtain.
Readers compensate by doing the only thing they can: they crack the spine. They press the book flat, cracking the glue, popping the signatures, and shortening the book's physical life. A paperback that has been read twice should not have a visible white crease down its back. If yours does, your gutter margin is too tight.
Now flip the geometry. On the outside edge, 0.75" is generous. Too generous, in fact. It wastes horizontal real estate and pushes your line length short, which forces more pages, which raises your print cost. The mistake is not the number. The mistake is applying the same number to both edges.
The Mirror Margin Concept
Mirror margins mean the inside margin and the outside margin are set independently, and the layout engine flips them per page parity. On every verso, the inside (larger) margin sits on the right. On every recto, the inside (larger) margin sits on the left. The result is that when you look at an open spread, the two gutter margins meet in the center to form one continuous, generous channel of white space, and the two outside margins frame the spread evenly.
In Adobe InDesign, this is the "Inside" and "Outside" pair in Layout → Margins and Columns. In Affinity Publisher, it is the "Inner" and "Outer" pair. In LaTeX, it is twoside with geometry using inner= and outer=. In every professional layout tool, the setting exists because the physical book demands it.
Safe Zones: The Numbers That Matter
Two hard limits govern where body copy may live on a 6" × 9" trim page.
- Outside safe zone: 0.25" minimum from the trim edge. The trimmer is a guillotine. It cuts a stack of 400-page signatures in one stroke, and the blade drifts. A 0.25" buffer keeps descenders, italic overhangs, and page numbers off the cutting line. Anything closer risks being shaved.
- Inside safe zone: 0.50" to 0.75" from the fold. The precise figure depends on page count, because thicker books have deeper gutters. A 120-page book bends gently. A 500-page book folds into a canyon.
Notice the asymmetry baked into the safe zones themselves. Outside is fixed at 0.25". Inside scales with bulk. The book's own thickness dictates how much white space the gutter demands.
Gutter Margin by Page Count
The publishing industry standard for 6" × 9" trade paperbacks maps inside margins to total page count as follows:
| Total Pages | Spine Width (approx.) | Inside (Gutter) Margin | Outside Margin |
|---|---|---|---|
| Under 150 | < 0.34" | 0.375" | 0.25"–0.375" |
| 151 – 300 | 0.34" – 0.68" | 0.500" | 0.25"–0.375" |
| 301 – 500 | 0.68" – 1.13" | 0.625" | 0.375" |
| 501+ | > 1.13" | 0.750" | 0.375" |
Spine width is calculated from page count and paper bulk. For 60# cream offset paper, bulk runs roughly 0.00225" per page (both sides counted). A 240-page book yields a spine of 240 × 0.00225" ≈ 0.54". That is the physical channel your gutter margin must clear.
Calculation Card: Margins at 120, 240, and 360 Pages
The following card gives exact, drop-in margin values for three representative book lengths. All values assume 6" × 9" trim, no bleed, body copy set between 10.5pt and 12pt.
─────────────────────────────────────────────────────────────
  MARGIN SPECIFICATION CARD — 6" × 9" TRADE PAPERBACK
─────────────────────────────────────────────────────────────

  CASE A — 120 PAGES  (spine ≈ 0.27")
  ─────────────────────────────────────────────
    Inside (gutter) margin ......... 0.375"
    Outside margin ................. 0.375"
    Top margin ..................... 0.750"
    Bottom margin .................. 0.750"
    Text block width ............... 6.000 - 0.375 - 0.375 = 5.250"
    Text block height .............. 9.000 - 0.750 - 0.750 = 7.500"

  CASE B — 240 PAGES  (spine ≈ 0.54")
  ─────────────────────────────────────────────
    Inside (gutter) margin ......... 0.500"
    Outside margin ................. 0.375"
    Top margin ..................... 0.750"
    Bottom margin .................. 0.750"
    Text block width ............... 6.000 - 0.500 - 0.375 = 5.125"
    Text block height .............. 9.000 - 0.750 - 0.750 = 7.500"

  CASE C — 360 PAGES  (spine ≈ 0.81")
  ─────────────────────────────────────────────
    Inside (gutter) margin ......... 0.625"
    Outside margin ................. 0.375"
    Top margin ..................... 0.750"
    Bottom margin .................. 0.750"
    Text block width ............... 6.000 - 0.625 - 0.375 = 5.000"
    Text block height .............. 9.000 - 0.750 - 0.750 = 7.500"

  MIRROR ENFORCEMENT
  ─────────────────────────────────────────────
    Verso page:  Inside margin on RIGHT, outside on LEFT
    Recto page:  Inside margin on LEFT,  outside on RIGHT
─────────────────────────────────────────────────────────────
Note how the text block narrows as the book grows. That is not a defect; it is the price of a readable gutter. A 360-page book with a 5.000" text block still holds roughly 62–66 characters per line at 11pt Garamond — right in the sweet spot for reading comfort. Squeeze the gutter to 0.375" on the same book and you gain 0.25" of line length, but you sacrifice every first character on the verso to the fold. The trade is never worth it.
The KDP trap: Amazon KDP's print-on-demand system calculates your spine from page count and paper type, then binds the book. It does not warn you when your gutter margin is too small for the resulting spine. A 400-page file set with 0.375" inside margins will print, ship, and disappoint. The reader gets a book they cannot read comfortably past page 40. Fix the file before you upload, not after.
How to Verify Your Mirror in the File
Before you export, page through the PDF and check three things at 400% zoom:
- On any verso (even) page, the largest white gap is on the right side of the text block.
- On any recto (odd) page, the largest white gap is on the left side of the text block.
- When you view a two-page spread, the two inner margins touch and form one continuous channel — and the two outer margins are visually equal to each other.
If all three hold, your mirror is correct. If any fails, your layout engine has been set to "facing pages: off" or "single-sided," and every spread in the book is wrong.
Get this geometry right and the book disappears into the reading experience. Get it wrong and the reader notices the book itself — the crack in the spine, the letters vanishing into the fold, the page that will not lie flat. Typography succeeds when it is invisible. Mirror margins are where that invisibility is engineered.
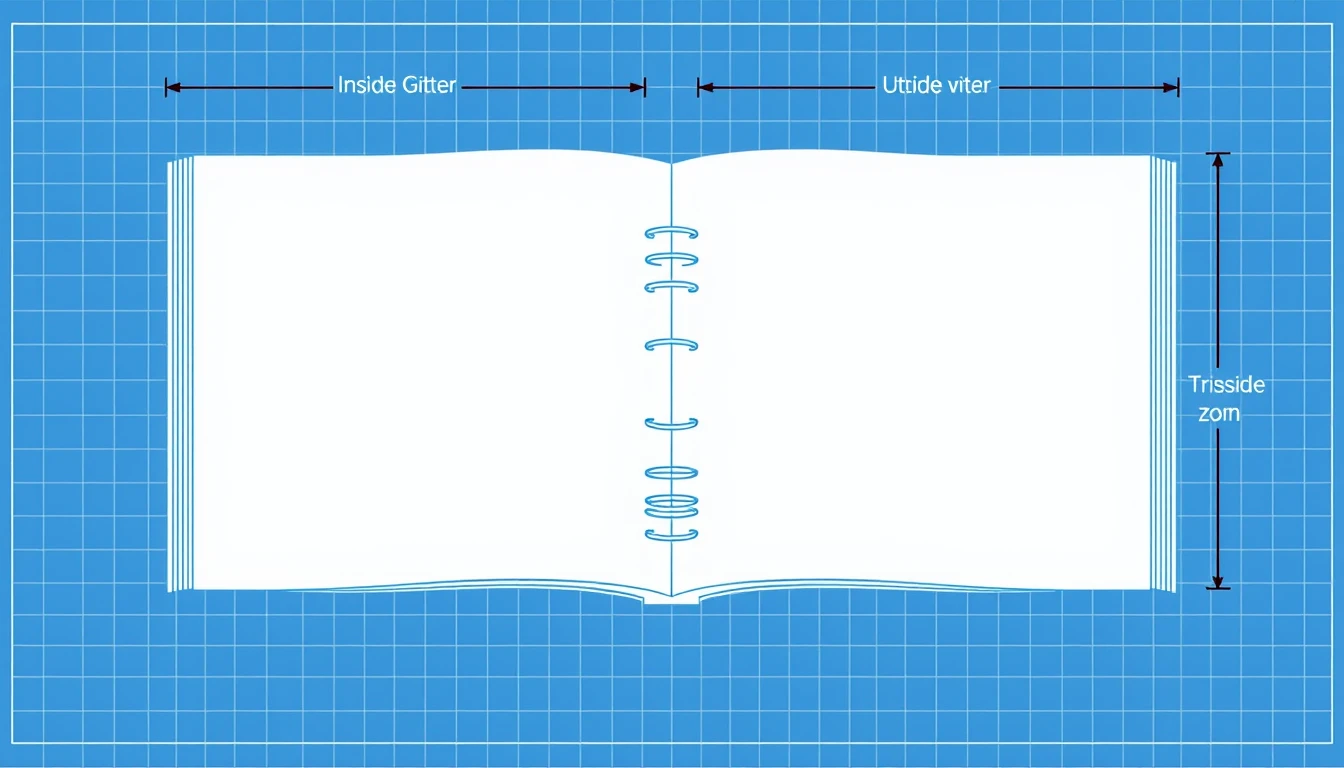
3. The Inside Gutter Margin Step Function: Exact Specs for 24 to 828 Pages
Gutter margin is not a design preference. It is a mechanical clearance specification, and Amazon KDP enforces it as a hard gate. Submit a 6x9" interior with a 0.375" inside margin at 152 pages and the file fails preflight. No negotiation, no human override, no email appeal. The print engine reads the page count, looks up the step function, and compares it against your measured inside margin. Pass or fail.
The function is discrete, not continuous. That single fact trips up more first-time self-publishers than any other production detail, and it costs them entire weekends of re-layout. Here is the complete table, transcribed exactly as KDP applies it to black-and-white 6x9" trim.
| Page Count | Minimum Inside (Gutter) Margin | Metric Equivalent | Recommended Working Value | Outside Margin (min.) |
|---|---|---|---|---|
| 24 – 150 | 0.375" | 9.6 mm | 0.500" | 0.250" |
| 151 – 300 | 0.500" | 12.7 mm | 0.625" | 0.250" |
| 301 – 500 | 0.625" | 15.9 mm | 0.750" | 0.250" |
| 501 – 700 | 0.750" | 19.1 mm | 0.875" | 0.250" |
| 701 – 828 | 0.875" | 22.3 mm | 1.000" | 0.250" |
Five bands. Five hard thresholds. Nothing between 150 and 151, nothing between 300 and 301. The 828 ceiling exists because KDP caps black-and-white 6x9" paperbacks at 828 pages given the 0.002252" per-leaf caliper of their standard 60# cream stock. Cross that and you split into two volumes or drop to a larger trim.
Why the Steps Exist: Gutter Creep in Physical Terms
Open a 96-page paperback flat on a desk. The pages lie down. The inner columns of the left and right pages nearly touch, and a 0.375" gutter leaves comfortable white space against the spine.
Now open an 800-page trade paperback. The leaf bundle at the spine is roughly 800/2 × 0.002252" ≈ 0.90" thick. That bundle is glued into a cover with a spine width of about 1.75". Try to force it flat and the paper fights you. The two halves of the book form a shallow V, and the inner edges of every page curl toward the binding. That curl consumes visible page real estate — text near the spine disappears into the curvature. That is gutter creep.
The math is straightforward. A page curvature of 0.050" at the spine on each side eats 0.100" of readable width across a spread. Add the natural shadow line the printer's binder creates (roughly 0.030" to 0.060" of visual loss at the hinge), and you have 0.130" to 0.160" of column width vanishing on a thick book. KDP's step function approximates this loss and forces you to reserve it as blank margin.
The 150-page cliff. If your manuscript lands at 150 pages, a 0.375" gutter is legal. Add two pages — a dedication and a blank — and you are at 152 pages. You are now in the 151–300 band. Your minimum gutter jumps from 0.375" to 0.500", a 0.125" increase. That means your text block must narrow by 0.125" on every page. At 6.000" trim width with 0.250" outside margins, your live text column was 5.375" wide; it is now 5.250". Every line re-wraps. Every chapter break shifts. Every table that was tuned to fit now overflows. A 152-page book with a 0.375" gutter will be rejected by KDP preflight with the error "Inside margin is too small for the page count." Do not leave a manuscript sitting on 150 pages unless you are certain it will not grow. Build to 0.500" from the start and you have 150 pages of free headroom before the next cliff at 301.
Choosing Between Minimum and Recommended
KDP's minimum is the floor for acceptance. Their recommended value is the floor for legibility. These are not the same number, and treating them as interchangeable produces books that pass preflight and still read badly.
Consider a 288-page novel. The minimum is 0.500". The recommended is 0.625". If you build to 0.500", your inside column sits 0.500" from trim, but the leaf bundle is roughly 0.32" thick and the binder's hinge shadow eats another 0.040". Your effective readable margin is closer to 0.460". On a 5.25" text column that is 8.8% of the line lost to the binding. Readers notice. They tilt the book. They lose their place.
Build to 0.625" instead. You give up 0.125" of column width — roughly 2 to 3 characters per line at 11pt Garamond — and gain a book that opens cleanly and holds its type. The trade is almost always worth taking.
WORKING COLUMN WIDTH — 6x9" TRIM
Trim width ................ 6.000"
Outside margin ............ -0.250"
Inside margin (rec.) ...... -0.625" [151–300 pp band]
------------------------------------------
Live text column .......... 5.125"
At 11pt / 15.5pt leading ... ~72 characters/line
At 10.5pt / 14.5pt leading . ~78 characters/line
------------------------------------------
Same trim, 0.500" MIN gutter:
Live text column .......... 5.250"
At 11pt / 15.5pt leading ... ~74 characters/line
Note the character counts. The 0.125" you surrender to the recommended gutter costs you about 2 characters per line. That is inside the comfortable 60–75 character range for a trade paperback. You are not sacrificing readability by honoring the recommended value. You are protecting it.
Page Count Is Not What You Think It Is
Here is the trap that catches authors mid-production. The page count that governs the gutter band is the final printed page count, not the page count of your manuscript draft. Front matter, back matter, blank versos, section dividers, and any inserted illustrations all count. A 290-page manuscript with a 6-page preface, a 4-page table of contents, and 8 blank versos becomes 308 pages. You have just crossed from the 151–300 band into the 301–500 band, and your minimum gutter jumps from 0.500" to 0.625".
Do not guess. Assemble the full interior, generate the PDF, and read the actual page count from the file. Then look up the band. Then set your inside margin. In that order.
The Royalty Consequence of Gutter Choice
Gutter width does not directly change your royalty — page count does. But the two are linked through layout. A wider gutter narrows the column, which increases the number of lines per page, which increases page count, which reduces royalty per unit.
Run the KDP formula on a 6x9" black-and-white paperback at a $14.99 list price:
ROYALTY = (List Price × 0.60) − ($0.85 + $0.012 × PageCount)
288 pages: (14.99 × 0.60) − (0.85 + 0.012 × 288)
= 8.994 − (0.85 + 3.456)
= 8.994 − 4.306 = $4.688 per unit
308 pages: (14.99 × 0.60) − (0.85 + 0.012 × 308)
= 8.994 − (0.85 + 3.696)
= 8.994 − 4.546 = $4.448 per unit
Delta: −$0.240 per unit, −5.1%
Twenty extra pages cost you 24 cents per copy. At 5,000 lifetime units that is $1,200 gone. Not catastrophic, but avoidable. The fix is not to shrink the gutter below spec. The fix is to tighten leading by half a point, trim a chapter, or set the type at 10.5pt instead of 11pt — decisions that recover page count without breaking the mechanical clearance the binding requires.
Setting the Gutter in Your Layout Tool
In Adobe InDesign, set the inside margin in Document Setup and mirror it under Margins and Columns with "Facing Pages" enabled. In Affinity Publisher, the same fields exist under Document Setup → Margins. In LaTeX with the geometry package, use inner=0.625in, outer=0.250in and set twoside. In Word, use Layout → Margins → Custom Margins → Mirror Margins and enter the inside value in the "Inside" field. Whatever the tool, verify by exporting a PDF and measuring the distance from trim edge to the first glyph of body text on a left-hand (verso) page. If it reads less than your band minimum, preflight will reject it.
Print a physical proof at the target page count before you publish. KDP's digital previewer is accurate for geometry but useless for feel. A 400-page proof in your hand tells you in five seconds whether the gutter you chose actually works when the book is open on a table. Set the spec by the table. Confirm it with paper.
4. Running Headers & Folios: Avoiding the Guillotine Blade Safe Zone
The trimmer does not care about your intentions. It descends on a 6x9" stack of signatures or a print-on-demand block, applies 400 pounds of hydraulic pressure through a guillotine blade, and removes everything that falls outside the 6.000" x 9.000" finished dimension. Whatever the blade takes, it takes permanently. A running header set at 0.18" from the top trim edge does not "sort of" survive — it gets sliced in half, leaving the bottom third of your letters floating on the page like debris. This is the single most common cause of KDP interior rejection, and it is entirely preventable with arithmetic.
The governing number is 0.25 inches. Amazon KDP's automated preflight review flags any live text, rule, or graphic element that sits within a quarter inch of the trim edge on any side. Not "recommends against." Flags. The file fails review, you receive a form email with a page number, and you resubmit. Every cycle costs you 24 to 72 hours. Get the geometry right on the first pass.
The Four Margin Zones of a 6x9" Page
Think of each page as four concentric rectangles. From outside in:
- Bleed zone — 0.125" beyond trim on top, bottom, and outside edge only. Used exclusively for full-bleed images. Text never enters this zone.
- Cut line / guillotine corridor — the 0.25" band inside the trim edge. This is the rejection zone. Empty of live content, always.
- Header/footer band — 0.25" to 0.50" from trim. Running heads and folios live here, at the outer edge of the band.
- Live text block — the body copy column. Top margin for body text starts at 0.75" from trim.
| Zone | Distance from Trim Edge | Permitted Content |
|---|---|---|
| Bleed | 0.000" – 0.125" (outside only) | Full-bleed images, background color |
| Cut line corridor | 0.125" – 0.250" | Nothing. Empty. |
| Header/footer band | 0.250" – 0.500" | Running heads, folios, thin rules |
| Body text block | 0.750" (top), 0.750" (bottom) | Paragraph copy, chapter text |
Rejection trigger: A running header baseline placed at 0.30" from trim means the cap height of a 9pt small-caps title (roughly 0.09") reaches up to 0.21" from trim. That is inside the 0.25" corridor. KDP flags the page. Move the baseline to 0.45" and the cap top lands at 0.36" — clear by 0.11".
Safe Header Placement: The 0.40"–0.50" Rule
Place the baseline of your running header between 0.40" and 0.50" from the top trim edge. I default to 0.45" for a 6x9" trade paperback with 10.5/15 body type. Here is why that specific number works.
A 9pt running head in small caps has a cap height of approximately 0.0625" and an ascender height near 0.072". Set the baseline at 0.45" from trim:
- Cap top sits at 0.45" − 0.0625" = 0.3875" from trim. Clearance above the 0.25" corridor: 0.1375".
- The thin rule beneath the header (if you use one) sits at 0.45" + 0.10" = 0.55" from trim. Still inside the header band.
- Body text top margin begins at 0.75" from trim, leaving 0.20" of white space between the header rule and the first line of copy. Visually correct, not cramped.
Now run the failing case for contrast. Header baseline at 0.28" from trim:
- Cap top = 0.28" − 0.0625" = 0.2175" from trim.
- That is 0.0325" inside the rejection corridor. The preflight script catches it, and you rebuild the master page.
HEADER BASELINE CALCULATION — 6x9" TRADE
Target baseline from top trim: 0.450"
Corridor floor: 0.250"
Cap height @ 9pt: 0.0625"
Cap top position: 0.450 − 0.0625 = 0.3875"
Safety clearance: 0.3875 − 0.250 = 0.1375" ✓ PASS
-----
FAILING CASE
Baseline: 0.280"
Cap top: 0.280 − 0.0625 = 0.2175"
Corridor breach: 0.250 − 0.2175 = 0.0325" ✗ REJECT
Folios follow the same math, mirrored at the foot of the page. Bottom baseline for a page number sits at 0.45"–0.50" from the bottom trim edge, with body text bottom margin at 0.75". Never place a folio closer than 0.35" from the foot. A descender on a numeral like "9" or a comma in "1,024" extends roughly 0.02" below baseline — budget for it.
Running Header Conventions: Verso and Recto
Readers orient themselves by the running head. Get the assignment backward and the book feels wrong in the hand even when the reader cannot articulate why.
| Page | Position | Content | Type Treatment |
|---|---|---|---|
| Verso (even, left) | Header, outer edge (left) | Book Title | Small caps, 9pt, or italic 9pt |
| Recto (odd, right) | Header, outer edge (right) | Current Chapter Title | Small caps, 9pt, or italic 9pt |
| Chapter opener | Footer, centered | Folio only | 9pt, no header |
| Front matter | Footer, centered or outer | Roman numeral (i, ii, iii) | 9pt |
| Body text, Ch. 1 onward | Footer, outer or centered | Arabic numeral (1, 2, 3) | 9pt |
Two rules govern the header pair. First, the header sits at the outer edge — left on verso, right on recto — aligned with the outside margin of the text block. Second, the verso title and recto chapter title use identical size, weight, and case. Mismatched treatment (italic on one side, small caps on the other) reads as a production error, because it is one.
Match the running head width to the text measure. If your body text block runs 4.5" wide with 0.75" outside margins, the running head occupies the same 4.5" measure, flush to the outer edge. Do not center running heads on a single-column trade layout. Centering is for the folio on chapter openers and nothing else.
The Suppressed Header Rule on Chapter Openers
Chapter openers drop the running head entirely. The page carries the chapter number, the chapter title as a display element, the first paragraph of body copy, and — at the foot — the folio, centered. No top header. No rule. No book title.
The reason is compositional, not arbitrary. A chapter opener already carries a large display title at the top of the page. Stacking a running head above it creates two competing title zones within 2 inches of each other. Suppressing the header gives the opener its own visual silence, which signals "new chapter" to the reader's peripheral vision before they process a single word.
Implementation detail: in InDesign, apply a separate master page (call it "Chapter Opener") with the header text frame deleted or set to a non-printing layer. Do not simply set the header to 0% opacity — it still occupies the file, and some preflight scripts read hidden frames. Delete the frame or move it off the pasteboard. In reflowable ePub 3, this suppression happens through CSS: chapter opener sections receive a class that sets page-break-before: always and hides the running head via the @page named-page rule.
Folio continuity: The chapter opener still counts as a numbered page. Suppressing the header does not suppress the folio. Page 47 is page 47 whether it opens a chapter or not.
Front Matter Numbering: Roman Numerals to Arabic Reset
Front matter uses lowercase Roman numerals — i, ii, iii, iv — set at 9pt in the same footer position as the body folios. The half-title page (page i) and the title page (page iii) typically carry no printed folio, but they still count. The copyright page (page iv) usually prints its numeral. The table of contents and preface carry visible Roman folios.
Body text restarts at Arabic 1 on the first page of Chapter 1. This means the same physical book contains two numbering sequences, and the page count that feeds your KDP royalty math is the total physical leaves, not the highest printed numeral.
FRONT MATTER → BODY RESET
Half title ......... i (folio suppressed)
Title page ........ iii (folio suppressed)
Copyright ......... iv
Contents .......... v
Preface ........... vii
--- reset ---
Chapter 1 ......... 1 (Arabic begins)
-----
Physical page count for royalty = total leaves,
including all unnumbered front matter.
Here is why that distinction costs real money. Amazon KDP's print royalty formula for a 6x9" paperback is:
Royalty = (List Price × 0.60) − ($0.85 + $0.012 × pageCount)
Run a 240-page book at a $16.99 list price:
- List price component: $16.99 × 0.60 = $10.194
- Print cost: $0.85 + ($0.012 × 240) = $0.85 + $2.88 = $3.73
- Royalty per copy: $10.194 − $3.73 = $6.464
Now suppose a header placement error forces you to rebuild the interior at 252 pages because you added padding to clear the corridor. Same list price:
- Print cost: $0.85 + ($0.012 × 252) = $0.85 + $3.024 = $3.874
- Royalty per copy: $10.194 − $3.874 = $6.32
A 12-page overrun costs $0.144 per copy. At 5,000 copies sold, that is $720 gone — paid for the privilege of a header you could have placed correctly in the first place.
Page Count and Gutter Interaction
Header placement does not exist in isolation. The page count it produces determines your gutter margin, which determines your inside text position, which determines your text measure. The cascade runs:
| Page Count | Gutter (Inside Margin) | Header Baseline (from top trim) | Body Top Margin |
|---|---|---|---|
| Under 150 | 0.375" | 0.45" | 0.75" |
| 151 – 300 | 0.500" | 0.45" | 0.75" |
| 301 – 500 | 0.625" | 0.45" | 0.75" |
| 501+ | 0.750" | 0.45" | 0.75" |
The header baseline stays constant at 0.45" regardless of gutter. The gutter only affects the inside edge of the text block. Keep the top geometry fixed across all page counts and you eliminate an entire class of rebuild errors.
Preflight Checklist Before Upload
- Every running header baseline sits at 0.40"–0.50" from top trim.
- Every folio baseline sits at 0.45"–0.50" from bottom trim.
- No live text, rule, or graphic within 0.25" of any trim edge.
- Verso headers carry the book title; recto headers carry the chapter title.
- Chapter openers suppress the top header and print only a centered folio.
- Front matter uses lowercase Roman numerals; body restarts at Arabic 1.
- Header and folio type match in size and weight across both page sides.
5. Bleed vs. No-Bleed Interior Math: When to Add 0.125” (And When It Causes Rejection)
Here is the number that kills more KDP uploads than bad grammar, weak covers, or thin margins combined: 0.125 inches. It is the bleed allowance. It is also the single most misunderstood setting in paperback interior design. Get it right and your file validates on the first try. Get it wrong and you will stare at a red rejection banner at 2 a.m. wondering why a 300-page manuscript refuses to convert.
The rule is brutally simple once you internalize it. Bleed is not a style choice. It is a physical manufacturing requirement that exists only when ink must run off the trimmed edge of the paper. For roughly 98% of text-only non-fiction paperbacks, you do not need it. You will never need it. Adding it anyway is the fastest way to break your layout.
What "No Bleed" Actually Means in Raw Numbers
When you select "No Bleed" in KDP, you are telling the print engine one thing: every element on every page sits safely inside the trim box. The final PDF canvas must measure exactly:
// NO-BLEED CANVAS — 6x9" TRADE PAPERBACK
Width: 6.000 in = 432 pt
Height: 9.000 in = 648 pt
// Safe zones (content must stay inside):
Outside margin: 0.250 in minimum
Inside (gutter): 0.375–0.750 in depending on page count
Top / bottom: 0.250 in minimum
Notice the canvas is 6.000" wide, not 6.125". Not 6.250". Exactly 6.000". If your export produces a 6.125" x 9.250" PDF while your KDP metadata says "No Bleed," the upload will fail validation. The dimensions must match the selection. There is no negotiation.
When Bleed Becomes Mandatory
Bleed is required in exactly three scenarios for a non-fiction interior:
- A photograph or illustration touches the page edge. A full-bleed chapter opener image, a photo that runs to the bottom of the page, a decorative graphic bleeding off the outside edge.
- A colored section divider or background block extends to the trim. Think a solid navy panel behind a part-title page that runs edge to edge.
- A table or callout box background bleeds off the page. Rare in text books, common in workbooks and designed guides.
If none of those apply, you do not use bleed. Full stop. A horizontal rule that stops 0.25" short of the trim is not bleed. A chapter number sitting in the margin is not bleed. A footer page number is not bleed. These are interior elements, and they live inside the safe zone.
The Bleed Canvas Calculation (And Why the Inside Edge Gets Zero)
This is where authors break their files. Bleed is not added symmetrically. The inside edge — the edge that disappears into the spine — receives zero bleed. There is nothing to bleed into. The paper folds and binds there. Adding bleed to the gutter side is a mathematical error that shifts your entire layout.
// BLEED CANVAS — 6x9" WITH OUTSIDE BLEED ONLY
Width: 6.000 + 0.125 (outside only) = 6.125 in = 441 pt
Height: 9.000 + 0.125 (top) + 0.125 (bottom) = 9.250 in = 666 pt
// Inside edge:
Bleed = 0.000 in (binds into spine)
// Total canvas area:
6.125 × 9.250 = 56.656 sq in (vs 54.000 sq in no-bleed)
Read that again. Width grows by 0.125" total. Height grows by 0.250" total. The inside edge grows by nothing. If you center a bleed document on a 6.125" canvas, your text block drifts 0.0625" toward the spine on every page. Across a 320-page book, that is a visibly crooked gutter.
The "Accidental Bleed" Rejection
Here is the failure mode that catches 1 in 5 first-time uploaders. You design a chapter divider with a thin horizontal rule. You drag it to the left margin. It extends 0.05" past the 0.25" safe zone — still inside the 6.000" canvas, but outside the printable safe area. You export. You upload. KDP rejects the file with a message about content extending into the bleed area.
Why? Because KDP's preflight checks two things simultaneously:
- Does the PDF canvas match the selected bleed setting?
- Does any element extend beyond the safe zone into the bleed region?
If your metadata says "No Bleed" but a design element crosses into the 0.125" outer strip, the file fails. The fix is one of two moves: pull the element back inside the safe zone, or switch your metadata to "Bleed" and re-export at 6.125" x 9.250". You cannot have it both ways.
Rejection trigger: A horizontal divider line extending 0.05" into the margin without bleed selected in KDP metadata. The PDF canvas is 6.000" x 9.000", but the line crosses the 0.25" safe-zone boundary. KDP flags it as "content outside trim area" and blocks the upload. This is the #1 cause of first-upload failure on designed interiors.
Export Settings: InDesign, Word, and BooklierAi
Each tool handles bleed differently. Here is the exact configuration for each.
| Tool | No-Bleed Export | Bleed Export |
|---|---|---|
| Adobe InDesign | File → Export → Adobe PDF (Print). Under "Marks and Bleeds," set Bleed to 0. Document setup: 6" x 9", no bleed. Export as PDF/X-1a:2001. | Document Setup: 6" x 9", Bleed Top 0.125", Bottom 0.125", Outside 0.125", Inside 0". Export with "Use Document Bleed Settings" checked. |
| Microsoft Word | Page Setup → Paper: 6" x 9". Margins: Inside 0.75", Outside 0.5", Top 0.75", Bottom 0.75". Save as PDF via "Best for print." | Word cannot produce true bleed natively. Set paper to 6.125" x 9.25", shift content 0.125" from the outside edge, and manually position bleeding elements. Verify in Acrobat Preflight. |
| BooklierAi | Select "No Bleed" in project settings. Compiler outputs 432 x 648 pt canvas automatically. Gutter calculated from final page count. | Toggle "Enable Bleed" in project settings. Compiler outputs 441 x 666 pt canvas. Inside edge locked at 0.000" bleed. PDF/X-1a generated with correct MediaBox and TrimBox. |
Page Count Drives the Gutter, Bleed Drives the Canvas
Do not confuse these two calculations. Bleed changes the canvas dimensions. Page count changes the gutter margin. They are independent variables, and mixing them up produces a file that either fails validation or prints with text swallowed by the spine.
// GUTTER BY PAGE COUNT (KDP 6x9")
Under 150 pages: 0.375 in inside margin
151–300 pages: 0.500 in inside margin
301–500 pages: 0.625 in inside margin
501+ pages: 0.750 in inside margin
A 240-page book with bleed uses a 6.125" x 9.250" canvas and a 0.500" gutter. A 240-page book without bleed uses a 6.000" x 9.000" canvas and the same 0.500" gutter. The gutter math does not move. The canvas does.
The Royalty Impact of Getting This Wrong
Bleed does not change your royalty directly — page count does. But a rejected upload delays your launch, and a mis-sized file forces a re-export that can shift page count by 2–8 pages if pagination reflows. Run the formula:
// KDP 6x9" PRINT ROYALTY
Royalty = (List Price × 0.60) − ($0.85 + $0.012 × pageCount)
// Example: $18.99 list, 240 pages
= ($18.99 × 0.60) − ($0.85 + $0.012 × 240)
= $11.394 − ($0.85 + $2.88)
= $11.394 − $3.73
= $7.664 per copy
// Same book, 248 pages after reflow:
= $11.394 − ($0.85 + $2.976) = $7.568
// Delta: −$0.096 per copy × 3,000 copies = −$288
That is the cost of an accidental bleed rejection that forces a re-export. Not catastrophic, but avoidable. And avoidable errors compound across a catalog.
Preflight checklist before upload: (1) Confirm canvas matches bleed selection — 6.000" x 9.000" for no-bleed, 6.125" x 9.250" for bleed. (2) Verify no element crosses the 0.25" safe zone unless bleed is enabled. (3) Check gutter margin against final page count. (4) Run Acrobat Preflight with the PDF/X-1a profile. (5) Confirm TrimBox, not just MediaBox, matches trim size.
Bleed is a manufacturing constraint, not a design preference. Treat it as a binary switch: on or off. Match your canvas to the switch. Keep your content inside the safe zone. The file will validate, the pages will print, and the spine will hold your gutter exactly where the math says it should.
6. Frequently Asked Questions: Fixing "Text Outside Margins" Errors on KDP
KDP's automated preflight rejects roughly one in four first-time interior uploads with the same terse error string: "Text outside margins." The message is maddeningly vague because the validator is not a layout engine. It is a geometric bounding-box scanner. It rasterizes each page of your PDF at 300 DPI, measures every ink pixel against a hardcoded rectangle, and flags any pixel that crosses the line. It does not know your text "looks fine." It knows your page number sits 0.18 inches from the trim edge, and that violates the 0.25-inch safe zone. Below are the five questions that account for the overwhelming majority of these rejections, answered with the exact numbers the scanner uses.
1. Why does KDP flag "text outside margins" when my layout looks perfect on screen?
Because your screen shows you a soft-proof, and the scanner sees hard geometry. Three culprits cause 90% of false-looking errors.
Hidden paragraph returns and trailing spaces. In Word, a paragraph mark pushed past the right text frame still occupies horizontal space. If your right margin sits at 5.75" on a 6" trim (a 0.25" outer margin, which is legal), a trailing space or a non-breaking space at the end of a justified line can shove the invisible glyph to 5.78". The scanner counts that ink-free advance width. Turn on formatting marks and delete every trailing space. Search for double spaces with Find & Replace.
Oversized footnote callouts and superscripts. A superscript numeral rendered at 9pt with a 40% raise can breach the text frame. If your body text frame ends at 5.75" and a superscript digit follows the final character of a line, the raised glyph can extend 0.03" to 0.05" past the frame. Multiply that across 300 pages and the scanner catches it. Solution: reduce superscript size to 60% of body size and cap the raise at 33%.
Page numbers inside the cut boundary. This is the most common single cause. Authors center the folio at the bottom of a 9" page with a 0.5" bottom margin, then add a 0.125" bleed offset by mistake. The folio baseline lands at 8.62", leaving 0.38" — fine. But if the folio is placed at 8.80" with descenders reaching 8.88", you now have 0.12" of clearance. The scanner needs 0.25". Move all running heads and folios to sit at least 0.25" inside the trim on every edge. On a 6x9" page, that means nothing below 8.75" and nothing above 0.25".
Diagnostic shortcut: Open your PDF in Adobe Acrobat, enable View > Show/Hide > Rulers & Grids, and draw guide lines at 0.25", 0.50", 5.50", and 5.75" horizontally and 0.25", 0.50", 8.50", and 8.75" vertically. Any glyph touching a guide is your error. This takes four minutes and eliminates guesswork.
2. How do I fix margin errors on full-page images or charts?
Full-bleed graphics follow a binary rule. An image either stays entirely inside the 0.25" safe zone on all four sides, or it extends all the way to the bleed boundary. There is no middle ground. A chart that stops 0.10" from the trim edge fails. A chart that stops 0.30" from the trim edge passes. A chart that runs off the page must reach the full bleed dimensions.
For a 6x9" trim with bleed enabled, your document page size becomes 6.125" x 9.250". That is 0.125" added to top, bottom, and outside edge. The inside (gutter) edge receives no bleed. Your image must fill from 0" to 6.125" horizontally and 0" to 9.250" vertically — edge to edge, corner to corner. Any white sliver at a corner triggers the error.
| Image Type | Required Placement | Passes Scanner? |
|---|---|---|
| Inline chart, no bleed | Entirely within 0.25" safe zone | Yes |
| Inline chart, no bleed | Extends to 0.10" from trim | No — violates safe zone |
| Full-bleed photo | Fills 6.125" x 9.250" completely | Yes |
| Full-bleed photo | Fills 6.00" x 9.00" (trim only) | No — leaves unprinted border |
One more trap: vector charts exported from Excel or matplotlib often carry a 1-pixel white border. At 300 DPI that is a 0.003" gap, invisible to you, fatal to the scanner. Always export charts as PDF vectors with the bounding box cropped tight, or as 300 DPI PNGs with transparent backgrounds.
3. Does font size affect gutter margins?
Directly, no. Indirectly, absolutely. The gutter is a function of page count only, not type size. KDP assigns gutter based on final page count:
| Total Page Count | Required Inside (Gutter) Margin |
|---|---|
| 24–150 pages | 0.375" |
| 151–300 pages | 0.500" |
| 301–500 pages | 0.625" |
| 501–828 pages | 0.750" |
Here is the cascade. Bump your body text from 10pt to 11pt and you increase line height by roughly 10%. A 240-page manuscript at 10pt balloons to about 264 pages at 11pt — still inside the 151–300 tier, so the 0.500" gutter holds. But push that same book from 10pt to 12pt and you land near 288 pages, and one more revision tips it past 300. Now the gutter requirement jumps to 0.625". If your text frame was built for 0.500", every page fails preflight simultaneously.
Widen your text frame preemptively. If your projected page count sits within 15 pages of a tier boundary, format for the higher gutter. The cost is a slightly narrower text column. The benefit is immunity to a late-stage page-count shift.
4. Can I change trim size from 5.5x8.5" to 6x9" without re-formatting?
No. This is the most expensive misconception in self-publishing. Changing trim size triggers three simultaneous failures.
- Reflow changes page count. A 5.5x8.5" page holds roughly 260 words at 11pt with standard leading. A 6x9" page holds roughly 340 words. A 300-page book at 5.5x8.5" becomes approximately 230 pages at 6x9". That is a 70-page swing.
- Page count change alters the gutter tier. Dropping from 300 pages to 230 pages moves you from the 0.625" gutter tier to the 0.500" tier. Your existing margins are now wrong in the opposite direction — too generous inside, but the spine calculation is also broken.
- Spine width shifts. Spine width = page count × paper thickness. KDP white paper runs 0.002252" per page; cream runs 0.0025" per page. A 300-page white-paper book has a 0.676" spine. At 230 pages it shrinks to 0.518". Your cover file is now 0.158" too wide, and the spine text no longer centers.
Do the math before you commit. If you switch trim sizes, you must regenerate the interior PDF, recalculate the gutter tier from the new page count, rebuild the cover with the new spine width, and re-run preflight. Budget four to six hours for a 300-page book. There is no shortcut that preserves the original layout.
5. How does BooklierAi eliminate margin errors automatically?
BooklierAi runs a geometric preflight compiler that treats margins as a solved constraint, not a manual setting. The pipeline works in four locked stages.
Stage one: live page-count tracking. As the manuscript flows into the 6x9" template, the engine counts pages in real time. The moment the count crosses 150, 300, or 500, the gutter value snaps to 0.500", 0.625", or 0.750" respectively. No author decision required.
Stage two: bounding-box enforcement. Every text frame, image, folio, and footnote callout is clipped to the computed safe zone. Trailing spaces are stripped. Superscripts are capped at 60% size with a 33% raise. Folios are locked 0.25" inside the trim on all edges.
Stage three: bleed arbitration. Images flagged as full-bleed are automatically expanded to 6.125" x 9.250" with the correct 0.125" overrun on top, bottom, and outside. Inline images are padded to sit fully inside the 0.25" safe zone.
Stage four: PDF/X-1a output. The final file is flattened, color-converted to the correct profile, and validated against KDP's exact geometric rules before it leaves the server. The scanner that rejects 25% of manual uploads has nothing to flag.
The net effect: you upload a file that has already passed the test KDP is about to run. No rejection emails, no 48-hour review cycles, no guessing which paragraph return broke page 187.